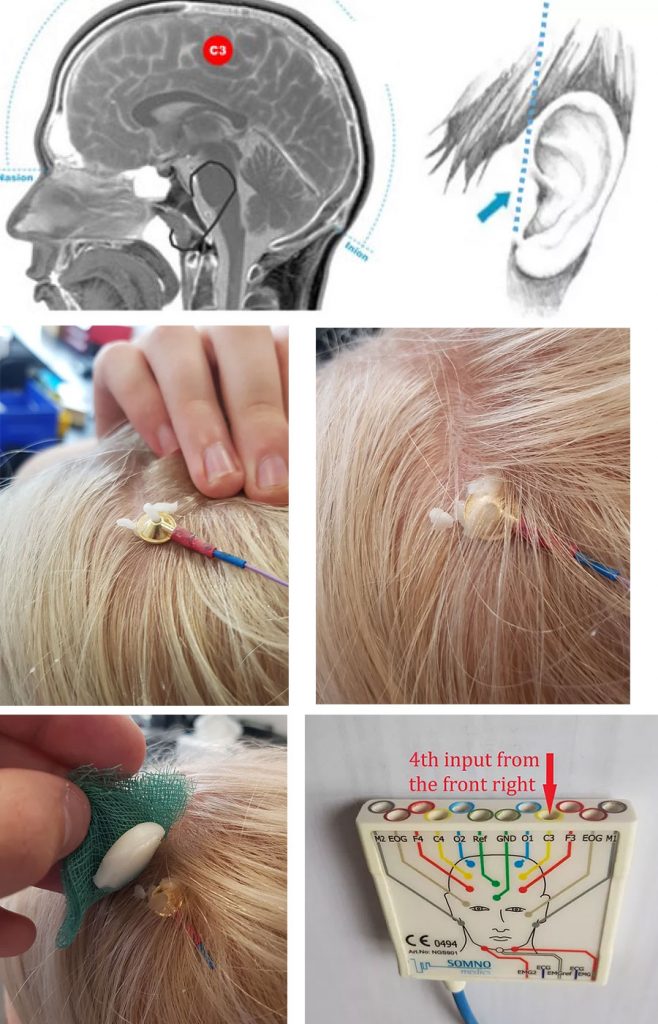
From the point directly in front of the participant’s left ear, measure the distance to the crown of the head (about an 85° angle) and trace back to three fifths of this distance. This will be the location of the C3 electrode.
Part the hair here to expose an area of the scalp. If too much hair sits between the electrode and the scalp, we will be unable to obtain a signal, so do your best to part the hair as well as possible.
Abrade this skin with a cotton tip and gel for about 30 seconds (this area is difficult to get a clear signal from, so the longer spent abrading the site, the better). It should also be noted that there is no need to wait for the abrasive gel to dry before affixing the electrodes here, unlike earlier when we were using the tape.
Take one of the paste filled electrodes and stick it down firmly over the prepared skin such that a ‘worm’ of paste squeezes through the opening at the center of the gold-cup.
Of the hair that is parted above the electrode (towards the midline of the scalp), take a pinch and pull it down over the electrode and squish the roots of these strands into the paste from the ‘worm’ and any that has spread out from underneath the electrode.
Then take one of the paste-filled gauze squares and squish it down over the electrode and hair. You may wish to fold another small pinch of hair over the electrode before you do this to secure the electrode further. This is a fine idea, just make sure that the paste sticks to the roots as much as possible, rather than the middle or the ends of the hair.
Take the end of the electrode and plug it in to the yellow C3 port (4th in from the front right of the headbox).